Chaos is the main antagonist in Dissidia. As the God of Discord, he summons villains from the worlds of Final Fantasy I to XII (except XI), in order to tip the balance of good and evil. He wages war on Cosmos, the Goddess of Harmony, to gain control of the world. He is set to return in Dissidia 012 as a fully playable character in a new form known as Desperado Chaos.
The God of Discord
Fighting Chaos[]
Chaos' style is fittingly named Master of Bedlam. Unleashing the mightiest of earth and fire based attacks, Chaos wreaks utter havoc and destruction upon his foes. His attacks cover a very large range and is capable of instantly warping to his opponent's position. When fighting Chaos, players may find him intimidating due to his sheer size and strength. However, here are a few tips for fighting Chaos, including his attacks.
- Chaos comes equipped with a summon, Shinryu. Unlike the player's summons, Shinryu regenerates during the battle, allowing Chaos to use Shinryu continuously during a single phase of battle. Shinryu's ability is Chaotic Deluge, which can generate random effects used by other summons, albeit enhanced. The effects he uses depends on the current phase.
- Omega Weapon: A beam will blow across your BRAVERY value, much like Omega Weapon. Every second, your total number of BRAVE points will be halved. It has an extended duration in comparison to Omega Weapon. This summon effect occurs in the first and second battles, when the opponent has a chance to win, but Chaos is not in BREAK state.
- Lich: A timer is set to 60 seconds. After 60 seconds have passed, the player will have their bravery set to zero. It has a longer timer in comparison to Lich. This summon effect usually occurs in the second battle, and will occur when the opponent has a large amount of bravery.
- Alexander: Chaos' BRAVE value remains constant for the summon's duration. It lasts longer than Alexander. This summon effect usually occurs in the first and second battles, and will occur when Chaos successfully breaks his opponent and accumulates a large amount of bravery.
- Ultima Weapon: A sword will appear on Chaos' BRAVE. After a few seconds, the weapon will begin to gather energy, after which will inflict BREAK status upon the opponent. It has the same effect as Ultima Weapon. This summon effect will only occur on Chaos's third form, and occurs when Chaos is broken.
- Pupu: Chaos' BRAVE will be halved of it's current value. After which, he will quickly regenerate his BRAVE back, similar to Pupu. However BRAVE is increased +99 instead of +60. Additionally, this summon works while Chaos is afflicted by BREAK. This summon effect usually occurs in the first and second battles, and will occur if Chaos is near break, broken, or close to recovering from break.
- Iron Giant: Marked by a large slash through the HP and BRV symbol, every HP attack performed by Chaos will halve the current BRAVE of his opponent, regardless of how much damage is done. It has the same duration as Iron Giant. This summon effect will only occur in the third battle, and will activate if the opponent has a chance to win, but Chaos is not broken yet.
- Ifrit: Chaos' current BRAVE is multiplied by 1.5. This effect usually occurs in the first or second battles, and will occur if Chaos's current bravery, when multiplied by 1.5, will give him a chance to win.
- Tiamat: A timer is set to 51 seconds. After the timer expires, Chaos' BRAVE is multiplied by 3. It has a longer timer in comparison to Tiamat. This summon can be nullified by breaking Chaos, if he is in break status, his BRAVE will not multiply. This summon effect will usually occur in the first or second battles, and sometimes occurs when Chaos can gain an ENORMOUS amount of bravery from using this.
- The Throne of Chaos, the arena where the battle is fought, is the smallest stage in the game. This serves to the benefit of Chaos more than the player because the majority of his attacks span across most or all of the stage (it also compensates for his slow walking speed because he doesn't need to move very much to reach the player).
- Chaos has three different phases, meaning you must fight him three consecutive times in order to defeat him. This turns into three different battles. With each phase, Chaos becomes stronger and/or his attacks are amplified.
- Chaos can absorb EX Force and EX Cores, though he does not have an EX gauge, and thus does not have an EX mode. He does, however, have a second, larger, more powerful form called "Utter Chaos," which he can transform into at will, beginning in the third phase of the battle.
- The player does not recover HP in between the three battle phases like Chaos does. Furthermore, the player's Summonstone can only be cast once during the duration of the entire battle (not once per battle phase). The player's EX gauge, however, is carried over between phases. Brave points are reset to base values both for the player and for Chaos.
Chaos' Brave Attacks[]
Ground Attacks[]
- The Ground 3-Strike Tail Spin
- This attack is characterized by Chaos spinning around, swiping side to side while on the ground, and ending the attack by spinning 360 degrees with a tail swipe causing multiple hits. This is an easy attack to avoid; either jump or guard to avoid damage completely. By jumping, or double jumping, the character can avoid the attack completely granting an opening for an attack. If the player chooses to, guarding the attack will cause Chaos to stagger. In the second fight, the range slightly, if any, increases, and in the third fight, a flame effect appears on each side of Chaos, easily grabbing an unprepared opponent for increased damage in his grip. The flame to the side is a simple magic attack, and can be blocked with a normal block, along with his claw attack.

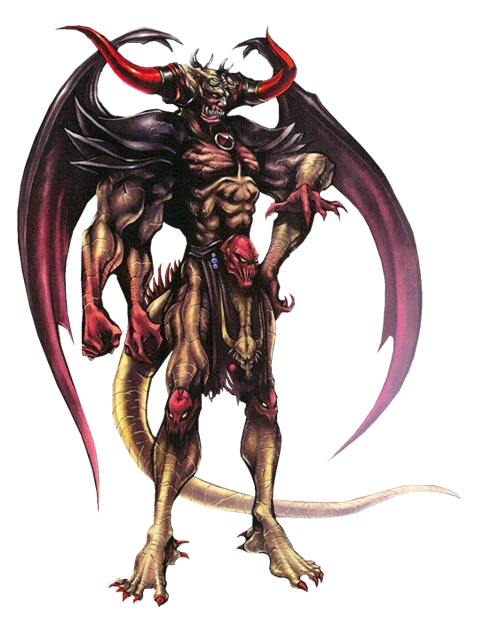
Chaos as he is seen on the box art.
- The Flame Wheel
- Chaos will wrap himself in fire followed by a flip while on the ground. The resulting attack is a wave of fire launched towards the character. This attack causes large knockback and usually causes the character to smash into the stage's boundaries. It is possible to block this attack without suffering any BRV or Crash Damage, but the player will be left staggering. To avoid staggering, either run or dodge via R+X if the character is slow, to either side. However, avoid using slow attacks as a counter attack because Chaos recovers relatively quickly from this attack. In the third battle, Chaos will use this attack 3 times in a row, however, rarely he will dodge if the opponent is preparing an attack that will hit him.
- Underground Teleportation x3
- Chaos will vanish and if locked onto him, the camera will focus on the ground beneath the character. Chaos will then teleport from underneath attacking upwards, repeating this attack for a total of 3 times. If the character is caught in either hit, they are stunned at the peak of his attack, unable to dodge the subsequent teleportations. To avoid this attack, either run or dodge the moment before Chaos appears. However, do not try to guard this attack as it will cause the character to stagger and thus will be hit by the other teleportations. At the end of this attack, Chaos will have a small downtime at the peak of his attack, allowing the character to momentarily attack. This attack can only be used in the second and third phase.
Air Attacks[]
- The 360 Degree Spin
- Chaos can only use this attack when he is in the air. He will dash towards the opponent followed by several spins creating rings of fire that deal damage to the character. Although this attack can be successfully guarded, Chaos does not stagger. Additionally, the rings unleashed by this attack are projectiles in nature, meaning they may be Air Dash-ed through without any harm to the player. If one chooses to block this attack, be warned that it will require pressing the R button repeatedly.
- Crater Slam
- When Chaos is far above the opponent or while in the air, he will use this move. Chaos rushes diagonally downward from his position, slamming into the ground opening a crater. The hitbox of this attack is very deceiving; the range of this attack is much larger than just his kick. Additionally, this move has some clearance in the air, so the player may still be hit even if they jump while trying to avoid this attack. Guarding this attack will cause the character to stagger but receive no damage (except in Duodecim, where both the kick and crater inflict Defense Crush). Be aware, being too close to the ground results in the attack connecting, only this time it has the 50% critical boost of staggering, followed by a wall rush, so be aware of your height. Dodging is the suggested action, being the only safe option that poses no risk for the character. Make sure to be out of the range of the resulting crater, or damage will still be taken.
- Great Balls of Fire
- Chaos launches a series of meteors that travel across the stage in a random manner. Colliding with this attack causes the meteors to explode, dealing damage. If it connects, the opponent will be in the air for an extended amount of time, which makes this move easily chainable to other attacks. However, this attack is projectile in nature, so the meteors may be reflected back at Chaos with proper guard technique. Dodging or guarding are also options when dealing with this attack, as is Air Dashing. In the third battle, the meteors will cause you to stagger if you attempt to block them normally, resulting in a critical boost for the remaining meteors that connect, followed by Chaos's next attack.
- Tri-Slash Combo
- Chaos slashes vertically thrice dealing Brave damage. The range of this attack is extended by the slashes that are released due to the attack. This attack can be successfully guarded, and is recommended that the character do so, causing Chaos to stagger. Dodging this attack is not advised, because Chaos can hit you regardless of a successful dodge. In the third battle, this attack will also cause flames to rise from the ground, regardless of how high Chaos is. Being caught by the fire will instantly raise you to Chaos's level and his combo will fully hit you. It is recommended not to block because it can connect from behind, resulting in your block being nullified. Choose to not linger on the ground, because if Chaos is very high up, this attack will almost always connect.
Chaos' HP Attacks[]
- Condemn (Ground)
- Chaos causes the ground around him to conflagrate. After a few seconds, the ground will erupt causing damage in any area within the circle, including the space above it. Because Chaos cannot move while using this attack, he quickly draws-in the character from anywhere in the arena. To avoid this attack, initiate a dodge before the ground erupts. If you dodge too early, the attack will continue to suck you in and you will still be damaged. If the player manages to dodge this attack, he can take advantage of Chaos' long downtime after this attack to counterattack. The attack can be stopped by using an HP attack, however, any bravery attacks leading up to the attack will not cause the attack to end, only a successful HP attack will and it.
- Soul of Oblivion (Air)
- Chaos concentrates his energy inward. After charging for a few seconds, the energy is released in the form of an unavoidable beam dealing moderate Brave damage before dealing HP damage. It also causes the character to crash into the walls of the arena. This attack can be interrupted by attacking Chaos before the beam charges completely. Alternatively, since the beam only covers about 1/3 of the whole stage, it is possible to completely dodge this attack if you stay far away from him. If you are on the ground and he uses this attack, you have a chance to not be hit if he is far enough away.
- Divine Punishment (Air)
- Chaos surrounds the player with spheres of fire. During this attack, Chaos is not affected by almost any attacks. After four spheres around the player explode, the remainder will pierce the character in the form of swords, dealing Brave damage. Then, Chaos will teleport above the character sending a large, flaming sword straight down, dealing Brave damage and causing the character to suffer from HP damage as well as Crash HP damage. If the player is hit by one of the explosions, then any subsequent explosions and the sword will be unavoidable. This attack can however be dodged. First, do not attempt to walk out of this attack, or else the spheres will explode trapping you in the attack. Timing is crucial to dodging this attack: After the four spheres explode, either dodge left or right to completely dodge the attack. However, Chaos will still teleport above the location where the character was surrounded and send the flaming sword downward. If you find yourself still in the range of his attack, dodge again. After this attack, Chaos will be stuck in the air suffering the downtime of this attack, allowing the character to counterattack. If the player opts to, he can spam the dodge command to dodge out of this attack, although it does not work everytime. This is arguably Chaos' most dangerous attack, because most players find it very hard to avoid, and he tends to use it several times in a row, making dodging and then countering the only option.
- Attacks known which still can damage Chaos while Divine Punishment: [Fussilade] Particle Beam (Cloud of Darkness), Snatch Blow (Kuja), Wind Shear (Onion Knight), Tornade (Terra).
- Demonsdance (Air)
- Chaos teleports to the character, dealing brave damage, then tossing the character in the air dealing HP damage. Chaos will then again repeat the process for a total of five times. The last hit causes the character to be tossed upward with great distance, usually causing Crash HP Damage. This attack can be easily dodged if you have Controlled Recovery equipped. When Chaos teleports beside you, just dodge. Repeat for 5 times. Also if you have Controlled Recovery equipped you can fall out of his first few BRV attack and begin dodging the remaining attacks. Timing is crucial while dodging his attacks; the appropriate time to dodge is once per audio cue of a teleport. listen carefully and dodge accordingly.
- Scarlet Rain (Air)
- Chaos teleports to the center of the arena, where he surrounds himself with medium-sized explosions, which knock the character into the air, while creating and enlarging a meteor in his arms. While doing this, Chaos is also producing smaller meterors. Each of the small meteors will be sent towards the character dealing brave damage. Chaos then hurls the now large meteor at the character dealing HP damage. Chaos is invincible during this attack. The medium-sized meteors can be guarded, it is mnecessary to guard multiple times to repel all the medium-sized meteors. Do not overblock, meaning watch the meteors while they come at you instead of rapidly pressing R, as you will then block without a chance to move, nearly ensuring the large meteor will hit you. The large meteor can be dodged, but timing is crucial. Although he doesn't seem to use this attack very often, it can be very difficult to dodge when he does.
- Brink of Delusion (Special)
- Check 'Utter Chaos' section below for more info on this.
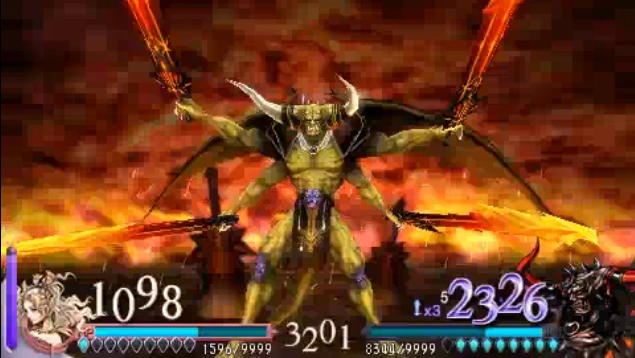
Utter Chaos[]
Chaos, holding four swords, during his ultimate attack
Although Chaos does not have an EX-Gauge and therefore no real EX-Mode, he does however have a special that does result in invincibility for a prolonged period of time, called Utter Chaos, with a super-powered special attack called Brink of Delusion. His "EX-Mode" is recognizable because Chaos will shout and leave the arena in a cutscene and start attacking from afar while in a giant form.
Chaos has 4 attacks available, and will attack four times during Utter Chaos, not neccessarily using all four attacks. It is notable that the attacks do VERY LITTLE damage.
1: Chaos will strike his sword down where the player is, possibly catching the player off guard.This attack is always the first, and does not happen again for the duration of the current Utter Chaos. Dodge in any direction (even backwards works!) to avoid this.
2: Chaos prepares a slash attack the sweeps the ground of the arena, causing multiple explosions on the surface. Retreat to the air to easily avoid this attack
3: Chaos flies in the air and stab his sword in the middle of the arena, causing a pillar of fire, similar to Cecil's Dark Flame, to track the opponent. Like Dark Flame, it is not a good idea to retreat very far in the air, for it becomes hard to predict the pillars location. It would be best to stay on the ground and run a circle around the point the sword hit the ground, avoiding the pillar all the same.
4: Chaos will prepared to stab the opponent straight on, causing walls of fire to erupt from the force of the attack. This is possibly the hardest attack to dodge. You must retreat to an area that is not covered in flame, which is very hard to find, even though the fire appears the exact same every time.
Before his "Ex-Burst" is complete, another cutscene will be initiated, which is an HP attack called Brink of Delusion, Chaos yells once more and throws 4 swords onto the sides of the arena. At this time, the screen will zoom out showing the player in the arena with large red circles forming. At this time, run to an area where the red circles do NOT cover. Failure to do so causes the player to receive HP damage. Chaos then returns to his throne surrounded by fire, and if the character survives, the battle resumes to where they left off.
This move is considered his Ex-Mode by many for various reasons. One reason is attributed to his change in form when using this attack, as all characters that enter Ex-Mode change their form, apparel, and/or weapon. Also, when a cheat device is used to access Chaos and his moveset, Utter Chaos can be used by pressing the buttons necessary to enter Ex-Mode (and therefore entering Ex-Mode, although there is no visible change), and then attacking.
Recommended Characters[]
Any character that has a fast movement speed and fast counterattacks will be ideal. Also if possible, using a character with chain attacks also works, since most HP attacks takes quite long to take effect.
1. Warrior of Light: WoL is practically built for killing Chaos. He can use his air attacks to easily juggle Chaos effortlessly, and his Shield of Light can block his 360% attack, one of his most annoying to new players.
2. Firion: Stick to the ground as much as possible. He can chain many attacks into Double Trouble. Weaponmaster is also notible for being useful for cornering such a large opponent.
3. Onion Knight: Chaos seems to have some difficulty avoiding Comet, since his stage is very small. Wind Shear can shield and counterattack most of Chaos's attacks. Onion Knight's speed is also an advantage for evasion and collecting EX Force and EX Cores.
4. Cecil: Dark Knight can abuse Valiant Blow and Dark Cannon very well. Paladin should not use Radiant Wings, as Chaos, along with many other characters, will block this. Go for his other moves, along with his great HP attacks that work very well against Chaos.
5. Bartz: Wind Shear can shield and counterattack most of Chaos's attacks.
6. Terra: Use an EX mode setup with EXP>EX, longer EX mode and EX absorb range accessories. Spam Holy Combo to Flare as fast as possible. Chain to Ultima whenever you feel like it to avoid getting nerfed by a summon, but don't EX burst. If Divine Punishment doesn't get immediately canceled by Holy hitting Chaos, do not move and use Tornado right away. All attacks will be blocked and Terra's tornado will deal HP damage to Chaos right at the end when he is above Terra. Blizzard is another good move to use. Your HP attacks should keep you in EX mode.
7. Cloud: Equip Omnislash Version 5, be at least Level 75, and have stuff that increase your attack power, you can finish him off in one blow in all three parts, IF Bravery is above 5500.
8. Squall Leonhart: Dodge and break him to gain stage bravery easily through Beat Fang; use Aerial/Fated Circle against his magic attacks, otherwise use Blasting Zone whenever an opportunity presents itself.
9. Zidane: Spam Grand Lethal.
10. Tidus: Use a dodge>BRV Iai Strike and EXP>HP build and go memorize his attacks. This will get you an impressive amount of BRV while EXP>HP will keep you alive through the three battles. Also utilizing the 'Quick Hit' chains is helpful; Chaos leaves himself open to freely attack after many of his moves (Condemn and Soul of Oblivion). Chaos seems to almost completely unable to dodge 'Spiral Cut'; spam freely and constantly.
11. Garland: Spam Tornado immediatly after Using Blaze while in mid-air at a medium distance from Chaos. Chaos will frequently dodge INTO the Tornado, allowing you to set him up for EX-Bursts.
12. The Emperor: Set up traps. Since the stage is very small, he will be taking a lot of damage from them.
13. Cloud of Darkness: Dodge and spam [O-Form] Particle beam. It follows him and hits for wall crash damage.
14. Golbez: Use Golbez's Float or Gravity system attacks whenever Chaos staggers due to a successful block or right after an attack. Due to his huge armor and height, Golbez is also at a disadvantage against Chaos' Divine Punishment attack. Any movement from him is enough to touch the orbs and get hit, so timing is crucial in Golbez's case to successfully avoid this attack. Since Chaos often likes to charge directly at opponents, Golbez should not be at a lack of opportunity to use either his Gravtiy or Float systems followed by a Cosmic Ray.
15: Exdeath: Can counter almost all his attacks with All Guard, then use Almagest to deal normal and crash HP damage.
16. Kefka:
17. Sephiroth: Sephiroth can use Sudden Cruelty equipped with Counterattack,Sneak Attack and Riposte if you have have a chance to guard an attack. Scintilla can also make good use of Riposte. Sephiroth can have an Ex Build equipped with Ex critical boost to maximize damage
18. Ultimecia: Very useful as she has the Knight's Axe (not charged) for initiating a Chase Sequence which is very effective, augment your damage during chase by being in EX mode.
19. Kuja: When the battle starts, use Ultima and move while you are using it. He will be hit by it and will be sent backwards. Keep to the opposite side of the arena from him and use Ultima as soon as the first one ends.
He'll charge you, but will dodge about halfway across the map. Just keep the Ultima between you and him and he'll charge you again, except that he'll run into the Ultima blast. As soon as you can, use Ultima again and keep at it.
20. Jecht: You can Jecht Block his Crater Slam dropkick BEFORE Chaos connects with the ground and you won't stagger providing an opportunity to attack. Spamming the aerial Jecht Stream-"To the Ground"-Triumphant Grasp combo works wonders as it deals high damage and often a good deal of wall rush damage due to the small stage. If you miss the timing for Triumphant Grasp, initiate the chase and hit him towards the ground. Chase him there even though he will hit the ground and immediately activate Triumphant Grasp. Chaos has a tendency to activate Condemn in the gap between hitting the ground and Triumphant Grasp. However Triumphant Grasp ignores the knockback effect of Condemn AND rips Chaos out of his Condemn attack provided it's initiated quickly. Also it'll be very great to use Ultimate Jecht Shot with Snooze and Lose. While you'll be charging Ultimate Jecht Shot, Chaos won't be able to attack and so Snooze and Lose will reduce his bravery to zero, allowing to make easier bravery break.
21. Shantotto: Use Aero's suction affect to your advantage.
22. Gabranth: Always stay in EX Mode. If you start without a full EX gauge, take your time to dodge Chaos's first attack and charge. Once you're in EX Mode, spam Dual Rend. When it hits, dodge, wait a little bit, and then Dual Rend again. Chaos will never dodge after getting wall slammed, and will try to counterattack instead, and Dual Rend comes out faster than any of his attacks. After that, spam aerial Innocence.
Feral Chaos[]
Feral Chaos (Desperado Chaos in the Japanese version) is a new form of Chaos featured in Dissidia 012. Unlike the previous incarnation, this one can be unlocked as a fully playable character. He is a feral-like version of Chaos featuring an exaggerated appearance with apparent battle damage. As before, he is the strongest character in the game and seemingly moreso now that all of his attacks have Guard Break properties, rendering guard-and-counter tactics useless. His attacks also cover a very large area. Unfortunately, he is plagued by several disadvantages; he is unable to build up the EX or Assist Gauges and his Brave is constantly dropping down. In addition, his attacks have a very high CP cost, minimizing his moveset and abilities although as he levels up, most of these problems will be remedied. Because of his large size, he is an easy target to hit.
Alternate appearance[]
Feral Chaos's alternate costume, Jade Dissonance switches his red hues for green and cyan, in reference to his Final Fantasy XII incarnation.
EX Mode[]
- The power of discord reveals the true chaos! - Feral Chaos's body morphs into a more magma-like state, mirroring his appearance in the CGI intro of Dissidia.
EX-Bonuses[]
- Divine Might - Increases movement speed.
- Brutal - Increase attack and defense power.
EX Burst[]
- Regnum Dei - Feral Chaos breaks into the opponent's own EX Burst tunnel and throws them upward, shattering it as they enter his own realm; a dark void with a small ring of fire as the barricade. No further bonuses are given here and the player may continue to fight the opponent for 20 seconds like normally. Feral Chaos's EX Gauge also freezes so as to not prematurely end the EX Burst. Once time is up or the player presses Square and R beforehand, the final strike Nex Ultimus is performed as Feral Chaos thrusts his claws into the opponent and holds them up as they are then immediately impaled by several of Chaos's swords. It ends showing the victim's point of view as Chaos proceeds to aim for their face and the screen blacks out like a TV screen. This EX Burst can be countered if the opponent activates his/her own EX Burst before Nex Ultimus activates which will cancel out Regnum Dei.
Trivia[]
- Chaos is not playable without the use of special cheating software on the PSP, although you can purchase him in the PP shop as an opponent in Quick Play mode. He can only be fought against in The Edge of Madness, however. The player only has the options of changing his level and stage form.
- Chaos cannot equip Accessories, like the Phoenix Down Ring.
- While playing the true form of the stage, it is possible that the character receives the penalty of doing nothing while Chaos transforms. Although this cannot be helped, it causes the character to be hit by the initial attack after the cutscene.
- When Chaos uses Utter Chaos, his appearance becomes his sprite's appearance in Final Fantasy.
- After performing Brink of Delusion, Chaos's position after reverting back is similar to Amano's Chaos's artwork.
- Sometimes a bug occures at start of second fight when the camera angle shoots at the same position as the first fight. Chaos will animate like usual and after his animation ends, he will freeze until the battle starts.
- Another bug occures at Brink of Delusion HP attack at player. After Chaos throws 4 swords and the camera view returns back to the player and arena, the bug will make the stage dark and black making players unable to locate his Brink of Delusion's damage area.
| Characters |
|---|
| Introduced in Dissidia Final Fantasy (2008) |
| Warrior of Light · Garland · Firion · The Emperor · Onion Knight · Cloud of Darkness · Cecil Harvey · Golbez · Bartz Klauser · Exdeath · Terra Branford · Kefka Palazzo · Cloud Strife · Sephiroth · Squall Leonhart · Ultimecia · Zidane Tribal · Kuja · Tidus · Jecht · Shantotto · Gabranth · Cosmos · Chaos · Cid of the Lufaine · Shinryu |
| Introduced in Dissidia 012 Final Fantasy |
| Kain Highwind · Gilgamesh · Tifa Lockhart · Aerith Gainsborough · Laguna Loire · Yuna · Prishe · Vaan · Lightning · Feral Chaos |
| Introduced in Dissidia Final Fantasy (2015) |
| Y'shtola Rhul · Noctis Lucis Caelum · Ramza Beoulve · Ace · Materia · Spiritus |
| Introduced in Dissidia Final Fantasy Opera Omnia |
| Maria · Leon · Guy · Edge Geraldine · Yang Fang Leiden · Palom · Rydia · Faris Scherwiz · Galuf Halm Baldesion · Krile Mayer Baldesion · Lenna Charlotte Tycoon · Shadow · Setzer Gabbiani · Edgar Roni Figaro · Sabin Rene Figaro · Celes Chere · Relm Arrowny · Yuffie Kisaragi · Vincent Valentine · Cid Highwind · Cait Sith · Zack Fair · Seifer Almasy · Raijin · Fujin · Zell Dincht · Quistis Trepe · Irvine Kinneas · Selphie Tilmitt · Vivi Ornitier · Adelbert Steiner · Eiko Carol · Garnet Til Alexandros XVII · Wakka · Seymour Guado · Auron · Rikku · Lion · Lilisette · Penelo · Balthier · Ashelia B'nargin Dalmasca · Vayne Carudas Solidor · Sazh Katzroy · Hope Estheim · Oerba Dia Vanille · Snow Villiers · Oerba Yun Fang · Serah Farron · Caius Ballad · Yda Hext · Thancred Waters · Papalymo Totolymo · Alisaie Leveilleur · Agrias Oaks · Layle · Yuri · Chelinka · Rem Tokimiya · King · Cater · Deuce · Seven · Machina Kunagiri · Mog |
| Introduced in Dissidia Final Fantasy: Secretum -Himitsu- |
| Locke Cole |
| Others |
| Chocobo · Moogle |